Home About Me My Store Freebies Pinterest Facebook Instagram TeachersPayTeachers Email Twitter Image Map
Showing posts with label Graphic Organizers. Show all posts

Ways to Use Reading Response Graphic Organizers in Your Classroom


What if there were reading response organizers that were rigorous, differentiated, and flexible enough to be used with any lesson? And they were free!

Yes, you read that correctly; and you can get them right HERE.

I have been using a particular set of templates over the years that meet all those parameters. I keep an extra set of paper worksheets printed and ready to go. The digital version have their own folder in my Drive so I can find and share them in a few seconds. 

If you limit your responses to a few standard organizers, you will be reducing the cognitive load of your students and allowing their brains to focus in on the specific content you are teaching. They will be able to respond in a deeper and more meaningful way because they will already be familiar with the template.

Although these organizers lend themselves to reading response, they can also be used during your math lessons or as a summative response. For example, students can be assigned a Memory Box or 3-2-1 Response after a field trip (virtual or in-person). Click over to the Best Virtual Field Trips for Your Elementary Classroom for field trip links!

Let me share with you my 5 "go to" response sheets:


FOR FICTION AND NONFICTION


5 Square Organizer 

Some people refer to this as a 4 Square Organizer; despite the spot in the middle. However, the basic premise is that one particular topic or question is presented in the middle (or top) of the graphic organizer. Then, students use the 4 remaining spaces to input data, opinions, notes. 

Ideas for a 5 Square Organizer:

  • Place a vocabulary word in the center and have students fill in the four remaining spaces with things related to the word such as: definitions, antonyms, synonyms, sentences, drawing/graphics, text citations. This would be applicable to math vocabulary, too!
  • Put a character's name in the middle and have students cite details from the text that help them understand the character. These examples could be related to character traits or physical traits.
  • Similar to starting with a charcter in the middle, you could start with a character trait in the middle. Ask students to cite examples in the text where a character demonstrates that trait.
  • Name a text (or section of text) in the middle. Ask students to fill in the spaces using categories such as: People, Objects/Symbols, Vocabulary, Message/Theme, Problem/Solution, Cause/Effect, Favorite Part.


3-2-1 Response

This one is a classic. If you've been in teaching for a few moons, you've probably seen some variation of this response. Basically, it asks students to share 3 interesting words or people, 2 things they learned, and 1 question they still have.

When I assign this response I make sure to explain the expectations. For instance, no "repeat" of ideas and use complete sentences on the 2 and 1 response.

A 3-2-1 Response lends itself to some great post-lesson discussions. When I assign this as a digital response, I will oftentimes answer the question while grading the work. It's a nice opportunity to connect with students on an individual level. The "1 Question I Still Have" can also be used to start discussions the following lesson. 


Memory Box

A Memory Box is about as flexibile a response as you can find. The basic idea is that students need to fill in the spaces with information from the text or lesson. Teachers can increase rigor by giving specific parameters for the Memory Box. 

For math applications: have students write the different fact families for a given number. Or, ask them to describe the properties of a particular shape. 


Way to increase rigor with a Memory Box:

  • Require students to use complete sentences.
  • Quote statements from the text and indicate if they are fact or opinion.
  • State inferences from the text and cite the pages/quote that led to the inference.
  • Describe cause and effect events within the text.
  • Cite text evidence that demonstrates character traits for a given character, or give the students a character trait and ask them to find evidence of that trait in different characters.


FOR FICTION


Story Elements

This is a classic graphic organizer that helps students break down a story. It is loosely designed to mimic a 5 Square Organizer. The title of the text is written in the center of the page. The Characters and Setting are at the top, the Plot at the bottom. Plot can always be divided up using a Problem/Solution format.

Chapter/Section Summary Sheet

For a more detailed look at a chapter or section of text, teachers can have students fill out a Summary Sheet. This organizer asks students to fill in the chapter (or section) and explain what happened. 

When students first start to fill in the "What Happened" section they can sometimes be very generic with their responses. I encourage students to sum up the section by sharing something from the beginning, something from the middle, and something from the end. That small bit of guidance gives students just enough direction to put together a quality summary.

In addition to those two basic parts, students are also asked to share what their thoughts are about the section and to then make a prediction! These two parts help students to make connections to text, consider their opinions about events, and to do a little bit of thinking about how events they have already read may impact events later on in the book.

The "My Thoughts" and "My Prediction" sections are usually the most challenging for students. Oftentimes, students will write very shallow and basic responses such as "I like it" or "It is good". It can take a bit of modeling to get them to internalize what they are reading, formulate their own specific thoughts, and convey them in writing. 

Click here to get a set of these 5 graphic organizers for reading response for FREE!


Other Blog Posts You May Be Interested In:


Easy Back to School with Picture Books

Easy Back to School Picture Books

It's time for back to school! Are you ready? Do you have your lessons planned and your materials ready to go? I always find the first couple weeks of school some of the most exciting (and challenging) to plan. 

Trying to find a good balance between Team Building and Academics can be tough. In addition, there is the added challenge of trying to re-engage brains that have been on summer break. How much are they going to remember? What information will need to be reviewed? 

Save yourself time and frustration by using picture books, QR Codes, and a little bit of strategy!

EASY BACK TO SCHOOL 3 STEP STRATEGY


1. Choose a Picture Book

To help meet back to school challenges I use picture books! Picture books are a great way to build community through discussions, review skills or content, and also introduce new material. Picture books have the added benefit of offering flexibility to teachers when planning lessons and meeting the needs of all learners.

Students in the upper elementary grades appreciate a picture book, it's too often that they are expected to read and respond to only novels. There is a certain reduction in cognitive load when using picture books.

2. Print the Materials

Plan for print and go materials. Once you have a book in hand, the next step will be to print your materials. Choosing items that can be sent to the printer and have minimal prep will make your back to school planning easier than ever.

Once printed, sort out your materials based on when you will need them for your lessons. I also grab one copy of each printed page to keep in my plan book for reference as I work my way through the unit. 

3. Plan Your Pacing

Once you have a plan for which materials you will be using, plan your pacing. Think about using each picture book in two chunks of lessons. The first chunk of your lessons will be to address the reading standards. The second chunk of your lessons will be to address the writing standards.

Choose a picture book that will lend itself to a connected writing piece. For instance, if you are reading a fairy tale, plan for students to write their own fairy tale. The first chunk of lessons should focus on things such as: components of the text, how the author structured the story, or the elements that make the story entertaining. Build your student's knowledge base about the text structure. 

Then, when the second chunck of lessons are delivered for writing, students will have a firm grasp of how to draft their writing and structure their own story. They will also have the notes and responses from the picture book to remind them of what good writing looks and sounds like.

VOCABULARY & QR CODE ACTIVITIES

Vocabulary is such a key component in learning; especially in content areas. And, let's face it, it can be pretty dry and boring. So, I am always looking for ways to make it a bit more engaging for the students. 

To start, it helps to have visually appealing word cards (font and graphics). I prefer word cards that have some sort of icon to help students anchor the word in their brains. Engaging different parts of the brain when working with vocabulary will give students more than one area to pull from when they encounter or use the word later on.

Aside from word cards with graphics, it's also good practice to have students breaking the words down, doing their own word work, and looking at other ways the word shows up in our language. 

I like to have several copies of vocabulary worksheets printed and ready to go at any given moment. Not every word works with both sheets. Some words lend themselves better to one over the other. And, I don't break down every word. I will choose a word or two that I want the students to truly master. Those are the words I use to extend the learning and plan time for a deeper dive into the word.

Literary Terms Vocabulary
Literary Terms; Vocabulary Worksheets

Once students have had some exposure to and use of the words, QR Code scavenger hunts are a great way to reinforce and celebrate their learning. They are one of the most popular activities in my classroom. There is something magical about scanning a code and completing a task. 

For the first hunt of the year, students will be working their way around the room matching literary terms to definitions. Beginning with literary terms is a great way to open the year because students should have some working knowledge of the terms, it's great for review, and gets their brains geared for the school year. Plus, I know I will be using these terms regularly throughout the year. The deeper the mastery of the terms, the easier subsequent lessons will be.

QR Code hunts are also a great way to get students out of their seats while working on mastery of the material while building community. Students typically complete the hunts with a partner but they can be done individually as well. 

To Prep:

  • Print and post the codes around the room.
  • Print recording forms (if students are working in pairs/triads, teachers will need to decide if students will share a recording form or be responsible for their own).


Literary Terms Vocabulary
Literary Terms; QR Code Scavenger Hunt

Click HERE to get the Literary Terms Vocab Kit!

NATIVE AMERICAN PICTURE BOOKS


In the fall I use the following picture books to enhance my lessons about the Haudenosaunee while simultaneously hitting on many of the reading and writing standards. Although students will gain a lot of knowledge reading nonfiction text, I like to incorporate fiction and picture books whenever possible. The change up in text and illustrations keep the interest level up and the students engaged with the content.

The Rough-Face Girl

I can still recall the first time I heard this Native American Cinderella tale. The illustrations were as powerful then as they are now. Accompanied by David Shannon's masterfuly crafted illustrations are Rafe Martin's words telling this timeless tale which highlights those things which are most sacred to Native Americans. 

I love to use this book to examine character traits and delve into the values and beliefs of the Haudenosaunee culture. Students have an opportunity to evaluate the charcters and their behaviors. This book also provides excellent examples of simile, metaphor, and personification; not only through the words but the illustrations themselves.

Additionally, this picture book is a fantastic opportunity to lead your students through a compare and contrast writing piece. Most students are familiar with a Cinderella tale. However, even if they are not, it is easy enough to read another version to build up the knowledge base for the writing.

The Rough-Face Girl
The Rough-Face Girl; Evidence Chart

You can find find my print and go resource for The Rough-Face Girl HERE.

You can find plenty of read alouds for this picture book on the internet. Two that I like are listed below:

The Rough-Face Girl read by Rafe Martin

The Rough-Face Girl (Read Aloud)


Thirteen Moons on Turtle's Back

This beautifully illustrated text leads readers through the 13 moons in a year as a grandfather teaches his grandson about the significance of the turtle and its connection to the moons; thirteen different moons as observed and celebrated by thirteen different nations. 

Within the poetry that presents like prose, students will learn about the time of year, the cultural traditions of the people, as well as experience interwoven personification that brings nature to life for each moon's story.

Thirteen Moons gives readers another look at the Native culture which views many elements of nature as people/beings that have direct impact on our Earth and demonstrate how all things are connected.

Students can examine the construct of the Lunar Calendar versus the Gregorian Calendar. This will give students an opportunity to craft an opinion writing piece about which calendar they prefer.

Thirteen Moons on Turtle's Back
Thirteen Moons on Turtle's Back; Moon Note Catcher

You can find find my print and go resource for Thirteen Moons on Turtle's Back HERE.

Teachers can use the two links below to enhance the students' experience with the text and give them a deeper understanding of Native culture.

Chris & Kathy: 13 Moons on turtles back a Native American calendar.

George Couchie and Faith: 13 moons on a Turtles back


Rabbit's Snow Dance

Who doesn't love a fable? This funny and entertaining traditional Iroquois fable invites readers to watch Rabbit's attempt to make snow during the summer. Told with changing fonts and perfectly paired illustrations, readers are transported to a world where the animals are characters that have personality flaws and will learn a lesson by the end of the tale. 

Students will encounter a traditional Iroquois drum and song as Rabbit brings on snow in the midst of summertime! Along with the interwoven drum and song, students will learn how Native Americans explain the existence of pussy willows. This fable gives students a simple story that cleverly incorporates many of the cultural beliefs and traditions of the Iroquois. 

After students have had an opportunity to read and break down the different elements of this fable, they are then set to write one of their own! Rabbit's Snow Dance is a simple and direct way to build up a student's knowledge base for drafting their own fable. A fable is a structured creative writing piece that lends itself to many different approaches and gives the students an opportunity to truly put their creative juices to work.

Rabbit's Snow Dance
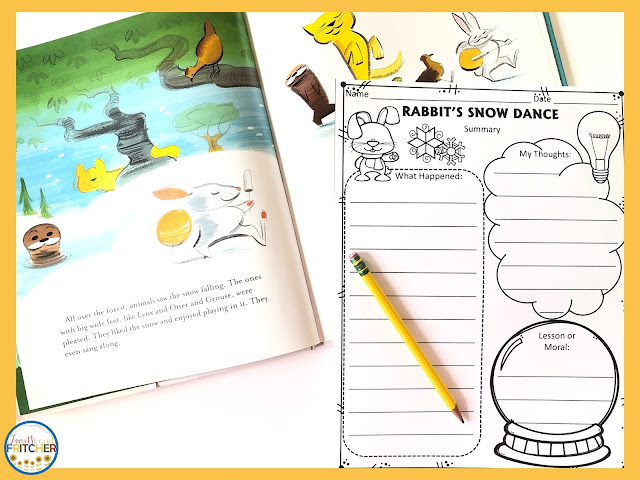
Rabbit's Snow Dance; Summary Sheet

You can find find my print and go resource for Rabbit's Snow Dance HERE.

There are many read alouds for this picture book on the internet. Two options are listed below (the first link read aloud is more decorative with graphics and music, the second is a more direct and simplistic approach).

Read Aloud Rabbit's Snow Dance

Rabbit's Snow Dance


Other PRINT and Go Picture Book Resources:

American Revolutionary War Stories BUNDLE


Other Picture Book Blogs:


Easy Back to School Picture Books

Best Character Analysis Strategies for Your Elementary Classroom

Basic comprehension skills can be challenging enough. When teachers ask students to dig deeper into text and develop skills for character analysis, it can be even more so. It doesn't have to be. With just a few poignant strategies you can get your students digging deeper into text and having more than a cursory understanding of the most complex characters ever written.  

Characters Traits Mat

These might be my most favorite thing - ever! The basic set up involves presenting students with a character trait such as "bravery", "perseverance", or "clever" and then challenge them to find evidence in the text where a character demonstrates (through their words or actions) that trait. 

I often assign students a mat that has 3 spaces the size of a sticky note. They write text evidence (with page number) on the stickies and place them on the mat. As they move through the novel, they continue to place notes on the mat while determining which evidence is the strongest. When students have acquired more than 3 stickies, they must arrange their notes with the strongest evidence on the top.

I love the flexibility of these mats. They are especially useful when more than one character displays a character trait. The discussions are richer and more complex. It also leads to discussing motives behind words or actions; and we also discuss when a character demonstrates a trait, if that is a core trait of the character or is it done with a bigger purpose?

Character Traits Mats Completed on Paper with Sticky Notes

When we moved to remote instruction, I redesigned the mats to be computer- friendly. Instead of 3 spaces, students now had 4. In the example above, The Tale of Despereaux was a read aloud. When we completed the mat as a group, during remote instruction, students did not have the novel in their hands. Thus, page numbers were not cited. With a later novel, Tales of a Fourth Grade Nothing, students had a novel in their hand and page numbers were expected.

Association Triangles

If you like Venn diagrams, you'll love Association Triangles. The main difference is that this organizer allows for the comparison of 3 characters (topics) and has a "sliding scale". Students cite text evidence that demonstrates a connection between the characters. If it applies to one character more than the other, the evidence will be closer to that character. If it applies to all three, the evidence is placed in the middle of the organizer.

Association Triangles Completed Digitally

I rarely expect students to cite page numbers for this response. Students are using a more global lens to consider the connections between characters/topics so pages numbers can be challenging. When appropriate, it's fun to place the students within the triangle (see Tales of Fourth Grade Nothing example) and offer them an opportunity to determine what, if any, similarities they have with the novel's characters.

FASTs

For deep character analysis, FASTs give students the direction to consider four different ways a single character presents themselves within a novel. 

F = Feelings

A = Actions

S = Saying

T = Thinking

Character Mats and Association Triangles have students exploring multiple characters at once. However, FASTs challenge students to hone in on a single character and develop a deeper understanding of that character's behaviors and motivations.

Students can start a FAST after the first chapter or two and build evidence as the novel progresses. They are an excellent tool and reference point for cumulative writing assignments at the end of a novel. They are especially helpful when students need to cite evidence while discussing or writing about characters. 

Character FASTs Completed on Paper
(Top: Because of Winn-Dixie, Bottom: The One and Only Ivan)

You can read about other strategies to use during your ELA instruction by clicking a link below:

Best Vocabulary Strategies for Your Elementary Classroom

Best Comprehension Strategies for Your Elementary Classroom

Grab your own set of editable character analysis activities (along with other reading responses) to use with your students from my TpT store here: Reading Response Worksheets or by clicking the image below.


Your download will include:
Google Slides

• Cover Slide

• 3 Vocabulary Slides

• 5 Comprehension and Character Study Slides

• 5 Author's Craft, Summary/Sequence Slides

• 3 Theme Written Response Slides


PDF Printables 

• Pre-Reading Activities

• Vocabulary

• Literary Devices

• Comprehension

• Character Analysis

• In-depth Analysis

• Summary & Sequence of Event Responses

• Theme Written Response

• Organizers & Rubrics


Best Comprehension Strategies for Your Elementary Classroom


There are oodles of strategies teachers use to help their students comprehend text. Some educators have a particular list of strategies they use and present them in a sequencial order. Others use a mix and work their way in, out, and around various strategies. Oftentimes the skill set required for each approach can criss-cross to create a woven tapestry of understanding for our students. 

In this post I will be describing two comprehension strategies that are suitable for any student and have a wide variety of applications.

Evidence Charts

Evidence charts are one of my favorite comprehension checks. They are a way for students to demonstrate their comprehension of the text without being limited to one correct response. In fact, it's quite the opposite. Evidence charts give students an opportunity to demonstrate some of the deepest and broadest thinking possible.

Students are presented with a statement. They are then tasked with finding evidence from the text that either supports the statement or refutes it. Depending on the statement, students can oftentimes find evidence for both.

The following are statements for Chapters 1-2 from my Tales of a Fourth Grade Nothing Literature Study resource:

  • Fudge makes good decisions.
  • Peter is polite.
  • It was Fudge's fault Mr. Hatcher lost the Juicy-O account.
One way to keep the statements generic and open to interpretation is to use statements that are opinions. As we read Tales of a Fourth Grade Nothing, the students did a great job finding evidence and applying it to the correct side of the chart. Finding and sharing evidence that can be used for both sides of the chart always leads to rich discussion and a deeper understanding of the text. 

Along with the text evidence, I also expect students to cite the page numbers. If evidence charts are done in a small group (or independently) and shared later, we have a reference point to use if we need to go back into the text. 

Digital Evidence Chart from Tales of a Fourth Grade Nothing

Much more rigorous than a multiple choice question, and oftentimes requiring inferring or synthesizing, evidence charts truly demonstrate if a student understands the text. Students cannot guess at the answer, nor can they fill in with "fluff". Plus, the page number citation keeps their answers concise.

The first few times we use evidence charts can be difficult if the student has never completed one. There is a learning curve. As with anything new, I model the first couple charts so the students have a clear understanding of the expectations. 

A positive byproduct of evidence charts is the practice students get with using quotation marks. We discuss the situations in which we should use quotation marks and how to punctuation them; we have even gone so far as to discuss the proper use of ellipses!

Summary Sheets

Summary sheets are a classic. Yet, the ability to summarize still eludes so many students. Regardless of how many times we teach or model summarizing, there remains confusion, over-simplification, or a plethora of unnecessary details. It's quite a challenge to get it "just right".

I have one summary sheet that I use the whole year. I use it every time I ask students to summarize. The only thing that might change is the clipart or borders. The response prompts stay the same.

Chapter/Summary Sheets (Printable on L, Digital on R) 

I sometimes ask students to summarize a single chapter (Chapter Summary). Other times I combine more than one chapter and call it a Section Summary. I do not have students fill one out every time we read a chapter. I use summary sheets during those times when I don't have a specific activity or response in mind or if I feel a need to check the students' understanding of the text.

My summary sheets are comprised of four sections:

  • Section/Chapter
  • What Happened
  • My Thoughts
  • My Prediction
The Section/Chapter is the easy section, right? So, minimally, students can complete one part of the response. When they move to the "What Happened" section I encourage them to write one event that happened at the beginning, one event from the middle, and one event from the end. This basic framework gives students a starting point for this section of the sheet. Over time, as they become more comfrotable with the format, they add more information and broaden their responses.

"My Thoughts" and "My Prediction" give me insight to what the students think about the events in the text. Although these sections are opinions and independent thoughts, students must be able to articulate their ideas, why they have them, and communicate the details in the text that led them to their ideas. These two sections usually offer some of the best discussion when they are shared in group settings.

For a more in-depth look at using summarizing strategies such as "5 Finger Method" and "SAAC" click HERE.

Fiction vs. Nonfiction


Evidence Charts and Summary Sheets are flexible enough to be used with either fiction or nonfiction. Students reading a science article or about a historical event can respond to statements (opinions) using the facts presented in the text. 

For example:
The Great Pacific Garbage Patch will always exist.
Benedict Arnold was smart. 

There are so many ways we can check students' understanding. Multiple choice responses are a quick way to do so. But if you are looking for tasks that have a more rigorous approach and give you greater insight into a student's comprehension, Evidence Charts and Summary Sheets are the better choice. 

You can read about other strategies to use during your ELA instruction by clicking a link below:

Best Vocabulary Strategies for Your Elementary Classroom

Best Character Analysis Strategies for Your Elementary Classroom

Grab your own set of editable comprehension activities (along with other reading responses) to use with your students from my TpT store here: Reading Response Worksheets or by clicking the image below.


Your download will include:
Google Slides

• Cover Slide

• 3 Vocabulary Slides

• 5 Comprehension and Character Study Slides

• 5 Author's Craft, Summary/Sequence Slides

• 3 Theme Written Response Slides


PDF Printables 

• Pre-Reading Activities

• Vocabulary

• Literary Devices

• Comprehension

• Character Analysis

• In-depth Analysis

• Summary & Sequence of Event Responses

• Theme Written Response

• Organizers & Rubrics


Easy Lesson Plans

easy lesson plans elementary classroom

I've written thousands upon thousands of lesson plans during my career. I've been at this game so long that when I started teaching we didn't list actual standards within our plans; we simply stated the goals and objectives. Alphanumeric standards weren't required or included. That all changed with the implementation of the Common Core and teacher evaluation systems.

Lesson plans today have taken on a life of their own. Along with standards, teachers are sometimes expected to incorporate other detailed components for every lesson: minute-to-minute time stamps, dialog, specialized questioning, accommondations/modifications, etc... Some lesson plan templates introduced to teacher candidates are 10 pages long! No one working in the trenches has the time to write (or read) a 10 page lesson plan. 

To balance out the simplistic lesson planning I used once upon a time with the overly-rigorous plans being introduced today, I suggest using the 4Ts. If you focus on the four Ts, you will have planned for all the major components of what makes a great lesson.

The 4 Ts are:
  • Target
  • Text
  • Task
  • Talk

Target

What is the standard? What is the ultimate goal for this lesson? That is your target. 

Granted, lessons can be crafted that work toward more than one standard. However, keep your eye on the one standard that is most important. It will help you zero in on the most critical aspects of your lesson.

Keep in mind that mastery of all standards is expected at the end of the school year. Thus, if your students are unable to perform at the proficient level at the beginning of the year - that is expected. My expectations for R4.1 in September are vastly different than in June.

If your district has designated "priority" or "focus" standards, incorporate them into your plans often. Create lesson plans that move the focus standards in and out of the spotlight of the lesson. They may not always be the main component of your lesson, but are always being worked toward.

Text

What are the students going to read/watch/examine? What is going to be the vehicle for the learning? That is the "text". 

Most of the time we use fiction and nonfiction passages to guide student learning. But, we know that there is a vast array of choices now. Perhaps you will be watching a BrainPop video or moving students through a NearPod. 

Delivering content is no longer reduced to turning to page 73 in a text book.

Are you dissecting owl pellets? Examining slides under a microscope? Designing and building STEM roller coasters? Whatever you use to deliver the content, think of that as the "text". 

Task

What is the expected outcome of your lesson? What are students expected to produce? What will you be looking at in order to determine the next lesson? That is the task.

Just as standards can move in and out of the "top spot" in lesson planning, so too can tasks. Realistically, there are several tasks we expect students to perfrom for any given lesson. Many expectations fall within executive function skills sets and oftentimes are not thought of at all. Organizational skills or computer savvy are sometimes taken for granted. 

However, if students do not have the organizational or computer skills required to fulfill the task, you may be setting up a scenario that leads to frustration for you and your students.

Build up the skill sets required for the ultimate task. Make certain you have explicitly taught your students how to move through a Nearpod before you expect them to navigate and respond to one independently. Ask yourself if your students know how to open and edit a Google Doc or Slide before you assign a task connected to using the technology.

Make a concerted effort to eliminate confusion about how to complete tasks before you expect independence with a task. We cannot expect students to demonstrate command of a standard if they are unable to navigate the tech to do so. A little planning and explicit teaching at the beginning will foster smoother and easier task completion later on.

Talk

Who will be doing the talking during your lesson? Who is sharing information? How will thoughts and ideas be communicated? What will the conversation look like? That is the talk. 

If the bulk of your plan involves only your voice, consider adding to the plan. As teachers we sometimes fall into the trap of being the only voice in a classroom. But, we know that students need time to speak to each other. Some of the best learning comes from their peers and the ability to flesh out their ideas as they learn new material and find ways to anchor their learning in their brains.

Aside from the usual speaking skills that educators typically think of when writing their plans, how else can your students "talk" with one another? In a digital world that might mean using Jamboards, polls, or shared Slides/Docs. Any vehicle that encourages students to share ideas with one another is a means for them to "talk"; the more vehicles for communicating, the better.

Make time in your lesson for students to communicate with each other. Move beyond the minimal "turn and talk" scenarios and truly consider how you can allocate a good chunk of the lesson to students digesting and discussing the material amongst themselves.

The Other Stuff

Within a 4T lesson plan are things such as the date, subject, materials, exit, etc... Those pieces are important too. However, if the bulk of your brain power is concentrated on the 4Ts you will have a carefully crafted lesson that will engage your learners and lead to mastery of the most challenging standards out there.

If you would like a free 4T lesson plan template click HERE.


easy lesson plans elementary classroom


Owl Moon Upper Elementary Literature Study


owl moon elementary literature study

I have used Owl Moon (the 1987 Caldecott winner by Jane Yolen) in my classroom the past few years. It is an excellent resource to help teach students many facets of author's craft; specifically figurative language!

Some may consider picture books too simple for upper elementary classrooms. However, some brilliant literature presented in a picture book format can lead your students to a deeper understanding of the elements of literature. Owl Moon is such a book. There are some excellent examples of simile, metaphor, and personificaiton in this picture book.

Yolen brings the reader through a unique encounter during the dead of winter. A young child heads out in the middle of the night to go owling with their pa. Told using a combination of figuative language and sensory details, along with visually stunning illustrations, readers are transported to a brisk winter night as the duo seek a Great Horned Owl. 

My Owl Moon literature study typically takes 5-8 days.

Before the Reading

Whether a picture book or a novel, I like to use a pre-reading probe and have students discuss a few different questions that relate to the book. With Owl Moon, I will only show the cover to the students - no flipping through the pages!

Discussion questions help get the students thinking about the plot or themes they will encounter in the book. A question such as: "What do you know about owling?" helps generate any ideas the students might have but it also prepares them for when they hear the word later on while listening to the book.

This is also a great time to review some figurative language. If you and your students have already worked with simile, metaphor, and personification, take a few minutes to go over these terms and remind students of how authors work them into a story and which key words to listen for.

During the Reading

For the first read, I do not show the illustrations. I ask students to close their eyes and allow Jane Yolen's words to create the pictures for them in their minds. I also ask them to listen for sensory details. At the end of the first reading, students take note on the sensory details. We share out and oftentimes will make an anchor chart of the details the students heard.

One optional activity I've done in the past is to ask students to choose the most detailed portion of the reading. During which part did they have the most vivid visualiztion? Then, they draw! To make it extra fun, I ask students to draw on blue construction paper using white chalk. 

Once students have had an opportunity to create their own visuals for the book, I will read it again. For the second reading, I show the illustrations and students will listen for the figurative language. Students will have been introduced or reviewed simile, metaphor, and personification prior to the second read. 

Option: you can show students a YouTube vidoe of this read aloud. The version linked below does not show the text- it gives students an opportunity to focus on the illustrations.

Read Aloud Version on YouTube (does not show text)

If it is the first time I have taught simile and metaphor, I break it up over two days. Simile the first day and metaphor the second. Using two days helps reduce the students' cognitive load and gives their brains an opportunity to "wire" the first term into their brains correctly before moving on to the second.

Teaching both terms in one day can confuse some learners. It's better to take the time and teach them on different days. Once the terms are incorrectly "wired" it can take significantly longer to correct the pathways.

Read more about cognitive load here --> Reducing Student Cognitive Load

During the second read, students take notes on the figurative language. This can be broken up in different ways: have students work in pairs/small groups, assign specific figurative language to students or groups, or ask students to focus on particular sections of the text. You may want to assign one group to simile, one group to metaphor, and one group to personification. Go over the figurative language and make anchor charts.

owl moon elementary figurative language

Once we have a list of the figurative language in the book, I like to have the students break down the language. What words does Yolen use and what is the message she is trying to convey? 

Students break this down using a simple chart labeled with "Figurative Language" and "Simple Language". This chart comes in handy later on when students are asked to transform their own writing from "simple" to "figurative". The chart can work both ways; start with the figurative and consider the simple. Or, start with simple and draft the figurative. 

owl moon elementary figurative language

Although the main focus of this unit is typically the figurative language, I also like to include lessons that strengthen comprehension, character study, and short (written) response. I use Evidence Charts and Character Mats to help students dig into the text and use text evidence to support their ideas. 

After the Reading

If I want to extend the students' learning, I have them write their own narrative. I give them the same organizers that we used to break down Yolen's story. The familiarity with the formats and how they can be used to organize and draft helps those students who struggle with writing tasks.

I start with asking students to think about a special experience they have had with another person. They then draft out the experience using a Begining-Middle-End chart. Once students have a good base to work from, they work toward revising their narrative using sensory details and figurative language. 

When I am leading my students into some complicated math algorithym I start will small numbers. I keep it simple so when the numbers get bigger, hopefully the algorithym has been learned and it's simply a matter of applying the same steps using bigger numbers. 

The same process can be used with picture books in upper elementary classrooms- shorter texts that give students a look at rich, beautifully crafted language and an opportunity to break down that text to fully understand how it enriches a story. Picture books can help students identify and practice the more complicated parts of our language and author's craft when the text is less intimidating; and Owl Moon is a perfect choice.

You can find everything you need to teach a literature study using Owl Moon in my TpT store here.


Free Figurative Language Resources

For FREE simile, metaphor, and personification printables for the book Owl Moon click here.


Click below to visit and explore other winter mentor texts!

You are invited to the Inlinkz link party!

Click here to enter
owl moon elementary literature study

Reducing Student Cognitive Load

cognitive load elementary classroom

Cognitive Load Theory... such a fancy way to say "how your brain learns". I have been fascinated by cognitive load, and brain research, for many years. The more I learn about how the brain processes information, the better my lessons become. If I can break the information down for the student in a way that creates or strengthens pathways in their brain, then the lesson was a success!

With this fall being a challenge for educators and students everywhere, cognitive load will be more important than ever before. For some of us, students (and families) will need to navigate new digital platforms while simultaneously adapting to a new teacher, new school environment, new schedule, new content, etc... cognitive load will be at the forefront (and heaviest) like never before. 

As I look at my plans for the fall I am carefully planning ways to decrease cognitive load for my students. So, what is cognitive load? And, how can we reduce cognitive load for our students?

COGNITIVE LOAD THEORY

In the late 1980's, researcher John Sweller did a study in which he determined that working (short-term) memory plays a significant role in learning. Working memory has limitations in size and functionality. Yet, information must pass through working memory to make a pathway to long-term memory. He theorized that if the amount of effort required within working memory can be reduced, the ease at which the information can make its way to long-term memory will be improved.

Each of us handles cognitive load differently. The amount of load that we can operate varies significantly between individuals as well the areas that are impacted. I worked with a colleague that could not have any extraneous noise (load) around her when trying to learn new material. For instance: pencil tapping, music, chatter, and the like, would shut down her ability to focus on the new learning. The extraneous load would become so heavy she could not shift energies to the intrinsic or germane load. This was a grown woman with a master's degree... Now imagine the same processing system in a ten-year old child.

As a teacher, we can take a look at the three different types of cognitive load and take explicit steps to reduce the load in one area in order to improve the capabilities of the others.

cognitive load elementary classroom

Types of Cognitive Load

  • Intrinsic: the amount of effort associated with a topic
  • Extraneous: the amount of effort given toward outside factors that interfere with the brain learning the topic
  • Germane: the amount of effort required to move the information from short-term to long-term memory

Intrinsic Cognitive Load cannot be altered. The level of difficulty is the level of difficulty. For example, multi-digit multiplication is an inherently difficult topic. We cannot change the level of difficulty. However, we can change the way the process is presented to students. We can alter the extraneous and germane cognitive loads and help the student build pathways to mastering the algorithm.

Ask yourself the following when considering intrinsic cognitive load:
  • How complex is this material?
  • Can I present this information in smaller chunks?
  • How many times will I need to present this information?

Extraneous Cognitive Load is very flexible. This is where lesson design and presentation can make a huge impact. As teachers, we can reduce the amount of extraneous cognitive load quite easily. Teachers can consider the physical learning environment, a student's individual needs, and the presentation of the lesson itself, to determine the level of extraneous load that will be required and make specific changes to reduce the load. Using the same graphic organizers to present information is one simple way to reduce the extraneous load. The student's brain will not need to process the graphic organizer: how it works, what the components are, where to write information, etc...They can focus on the material. Because the extraneous load has been lightened, the student's brain will shift gears to the intrinsic and germane loads and start to construct schemata. 

Ask yourself the following when considering extraneous cognitive load:
  • How can I present this information?
  • What other input is distracting the student from processing this information?
  • Can I simply the steps?
  • Can I present this information in a different way?
  • How can I reduce the exterior distractions?
  • How can I amplify the focus on instruction?

cognitive load elementary classroom
 Reduce Cognitive Load: 
Display Vocabulary Words in the SAME ARRANGEMENT 
as they will presented to students on paper. 
(L: Bulletin Board; R: Interactive Notebook)

Germane Cognitive Load is the effort used to pull from previously learned information to help master new information. Although generally thought to be immutable, we can use certain techniques to help lighten this load. It is the cognitive load that connects the present information with previously learned information. Referring back to the graphic organizer example: the student will see the familiar organizer, their brain will automatically process what is expected, and they will start to create pathways from their short-term memory (the new information in the organizer) that will connect with their long-term memory (previously used organizers).

cognitive load elementary classroom
Reduce Cognitive Load:
Use familiar graphic organizers to present and discuss new information.
(L: Breaking down The Great Law of Peace; 
R: Breaking down the vocabulary word "journey".)


Ask yourself the following when considering germane cognitive load:
  • What has the student already mastered that can help them process this new information?
  • How can I maximize the connections between new and mastered material?
  • What have I already taught that connects to this new learning?
  • How can I facilitate pathways for connecting short-term and long-term memory?

cognitive load elementary classroom

KEY TAKEAWAY

You can change the content or the presentation; but DO NOT change both. 

If you are interested in free resources to help lighten cognitive load, subscribe to Fourth and Fritcher and receive 5 digital templates. These templates are versatile, editable, and can be used over and over again to help your students learn new information and create pathways connecting their short-term and long-term memory. Click below and receive your templates today!

digital response organizers free

Given the amount of "new learning" that will take place in the next few months, cognitive load is more critical than ever before. Lighten the load in as many ways possible to ensure that pathways are clear, schemata is developed, and mastery learning is taking place.

cognitive load elementary classroom